I have fixed the link below, should be working fine now :)
Special offer, available this week only:
Or :
http://www.digital-photo-secrets.com/tip/focus-1-g4hiebn/
Get free photography ebooks, plus a photography emagazine containing video.
Best wishes,
Amy
Tuesday, January 29, 2013


Monday, January 28, 2013
Thursday, January 24, 2013
Outdoor Portrait Photography Tips

It’s not uncommon for domestic portrait photographer to head outside on a nice day and photograph their model. As a photographer I find that the studio can make people a bit nervous. The large lights and camera lens can make for a nervous experience. For shy people wanting their photograph taken, a studio isn’t always ideal.
Light is very important even in outdoor portrait photography. You must take your flash with you to fill in any shadows that appear. A reflector is a handy tool too. You can place the reflector under the persons face to shoot a very abstract shot, or, to simply get rid of shadows under the nose and chin.
Recently I did a portrait shoot outside. It was of a young lady who wanted photos for her portfolio. She was hoping to break into modelling. After some ideas back and forth it was decided that going to the park was an ideal way to do the shoot.
Lenses for portrait photography
Firstly, one of the most important features of successful outdoor portrait photography is the lens you use. Using the right aperture, focal length and depth of field are crucial factors to an outdoor portrait shoot.
A fast lens is the preferred lens by professional portrait photographers. What is a fast lens? A fast lens is a lens that has a very large maximum aperture. This may be anywhere between 1.8 and 2.8. This means that you can let a lot of light in and use a fast shutter.
Creative portrait photography ideas
You can develop a multitude of creative portrait photography ideas simply by practicing. Practicing gives you something so incredibly valuable: experience. Once you begin to gain more experience in outdoor portraits you will see how outdoor light and flash work, how shadows interact on peoples faces and most importantly how you can do it better next time.

Many of my most creative ideas come from receiving a formal education, but also, from watching the way light works. Light can give you some great ideas about where to position a person, how to angle yourself to get the best portraits.
Outdoor portrait photography poses
It depends on whether your model is male or female as to how you ask someone to pose for you. There are different stances that a man will take to appear more masculine. There are very different poses a woman will take so she looks more feminine. Female models look best when the lines of her body are accentuated. This involves turning on an angle, tilting the head and using the focus on the eyes. You can employ the use of a foot change to accentuate a postural change.

High key portrait photography
What does high key actually mean? Well if you go by the technical definition it is all about reducing the lighting ratio present in the scene. What this means, in English, is that the lighting is overexposed with just the main details in focus. This is great fun and a terrific way to create interesting portraits.
Can you use high key photography outdoors? Most definitely. As long as you have a strong light source on one side of the persons face, you can use the flash on the other side. Make sure you lock your focus on the eyes first so detail is maintained on the eyes.
(I will post some high key photos on the blog very soon, just as soon as I receive the model release form.)
Remember that shooting outdoor portrait photography is a great opportunity to have an interesting background. A park, beach or city street scene can enhance the story of your photo significantly.
Thursday, January 10, 2013
White Balance Explained
White Balance Explained
White balance is the way we gauge and establish the colour of an image. White balance means the "all over" colour tone itself. Colour tone is the broad colour that’s spread right over the entire picture. When you take a photo in the house, with no direct flash, you will sometimes notice a blue colour tone spread over the photo. This is your white balance.
Getting correct white balance is one of the most important factors of photography. When you have the correct white balance you will see that colours look true to life.. Skin tones look real also, instead of looking fake or too yellow. Correct white balance becomes a really central element of portrait photography for this reason.
How do we find the most correct white balance we can? First we need to comprehend that there is no one set white balance for every situation. Each white balance feature on your camera, like Tungsten for instance, is not correct for every occasion. Tungsten makes your photos look quite blue if they are photographed in normal light. When you photograph a subject that is under yellow lights it can make your subject appear too yellow. Photographing in Tungsten will eliminate the influence of yellow and help take your photograph back to a usual colour tone again.
Automatic white balance is the general selection for most newbie photography enthusiasts. This is fine as long as you fine-tune your white balance in Photoshop or Lightroom afterward. You will discover that if you shoot in auto white balance on a regular basis, your photography just won’t look very nice. You might find that your pictures just don’t replicate the proper colours that you see with your naked eye.
Shade and cloudy white balance are two favourites if you want to “warm up” your shots. They present a warm colour cast such as yellow, to overlay onto your pictures. This can be a great shooting feature particularly at twilight or sunrise. Shade and cloudy white balance can highlight the vibrancy in your warmer colours. This allows sunsets and sunrises to appear energetic. This is a nice option for sunrises.
Shade and cloudy white balance settings are not suitable for photographing people. The last thing we wish for in our wedding and portrait images is a yellow hue over a photo of the bride and groom. Tungsten is not correct either. We certainly do not need the bride and groom appearing too blue. Auto white balance doesn’t always succeed for portraits because of the way the digital camera is made. The digital camera you own does not naturally comprehend what colours should look like. When you choose auto white balance you give the digital camera free reign to do as it wants. This does not work well when you want true to life vibrancy.
True to life colour is dependent on “training” the camera to recognize colour. This is where custom white balance has advantages. When you level a grey card at the front of the camera and set your custom white balance to it, it then understands what’s happening. It then sets all colour either side of that grey tone. It’s quite difficult how it does this. As a photographer all you need to understand is that colour needs to be true, and a grey card is the means to do it.
Basically modify your white balance mode to custom. Then photograph a grey card with the correct exposure. Then it’s important to “set” the custom white balance from that photo. You will notice that for that precise photo session, your colours come to life. You’ll be able to see finer colours like light pink, magenta and lemon yellow as they really are.
White balance is one of the primary things to producing a striking photograph. If you follow these easy actions, no longer will you feel baffled about why you are not getting correct colour. It will truly transform the way you look at photography forever.

This colours you see are enhanced using a grey card and custom white balance. I've increased the vibrancy in Photoshop a little, but mainly kept everything looking natural.
To learn more just come and see me at www.DigitalPhotographySuccess.com
White balance is the way we gauge and establish the colour of an image. White balance means the "all over" colour tone itself. Colour tone is the broad colour that’s spread right over the entire picture. When you take a photo in the house, with no direct flash, you will sometimes notice a blue colour tone spread over the photo. This is your white balance.
Getting correct white balance is one of the most important factors of photography. When you have the correct white balance you will see that colours look true to life.. Skin tones look real also, instead of looking fake or too yellow. Correct white balance becomes a really central element of portrait photography for this reason.
How do we find the most correct white balance we can? First we need to comprehend that there is no one set white balance for every situation. Each white balance feature on your camera, like Tungsten for instance, is not correct for every occasion. Tungsten makes your photos look quite blue if they are photographed in normal light. When you photograph a subject that is under yellow lights it can make your subject appear too yellow. Photographing in Tungsten will eliminate the influence of yellow and help take your photograph back to a usual colour tone again.
Automatic white balance is the general selection for most newbie photography enthusiasts. This is fine as long as you fine-tune your white balance in Photoshop or Lightroom afterward. You will discover that if you shoot in auto white balance on a regular basis, your photography just won’t look very nice. You might find that your pictures just don’t replicate the proper colours that you see with your naked eye.
Shade and cloudy white balance are two favourites if you want to “warm up” your shots. They present a warm colour cast such as yellow, to overlay onto your pictures. This can be a great shooting feature particularly at twilight or sunrise. Shade and cloudy white balance can highlight the vibrancy in your warmer colours. This allows sunsets and sunrises to appear energetic. This is a nice option for sunrises.
Shade and cloudy white balance settings are not suitable for photographing people. The last thing we wish for in our wedding and portrait images is a yellow hue over a photo of the bride and groom. Tungsten is not correct either. We certainly do not need the bride and groom appearing too blue. Auto white balance doesn’t always succeed for portraits because of the way the digital camera is made. The digital camera you own does not naturally comprehend what colours should look like. When you choose auto white balance you give the digital camera free reign to do as it wants. This does not work well when you want true to life vibrancy.
True to life colour is dependent on “training” the camera to recognize colour. This is where custom white balance has advantages. When you level a grey card at the front of the camera and set your custom white balance to it, it then understands what’s happening. It then sets all colour either side of that grey tone. It’s quite difficult how it does this. As a photographer all you need to understand is that colour needs to be true, and a grey card is the means to do it.
Basically modify your white balance mode to custom. Then photograph a grey card with the correct exposure. Then it’s important to “set” the custom white balance from that photo. You will notice that for that precise photo session, your colours come to life. You’ll be able to see finer colours like light pink, magenta and lemon yellow as they really are.
White balance is one of the primary things to producing a striking photograph. If you follow these easy actions, no longer will you feel baffled about why you are not getting correct colour. It will truly transform the way you look at photography forever.
This colours you see are enhanced using a grey card and custom white balance. I've increased the vibrancy in Photoshop a little, but mainly kept everything looking natural.
To learn more just come and see me at www.DigitalPhotographySuccess.com
Tuesday, January 08, 2013
Monday, January 07, 2013
How to Photograph Texture and Detail in Nature Photography
How to Photograph Texture and Detail in Nature and Landscape Photography
For anyone considering experimenting with photography there are all sorts of possibilities for trying to capture various different textures. For instance, materials such as wood can often give the photographer with a variety of challenges and photographic examination. Regardless of whether the photographs will be shot in full-color or in the black and white style it is vital to make a well thought out “plan of attack” before beginning to capture the photos. This would incorporate visualizing the kinds of effects and consequences preferred and then working out a a small number of different approaches to shooting such images.
Let’s first consider photographs of wood or wooden objects. Because this is an organic material many people may not consider bringing wood into their studio setup for a photo session, but if we take just a second to contemplate how timber might look we can understand how it would succeed in the “sterile” or cleaner setting of a studio surroundings.
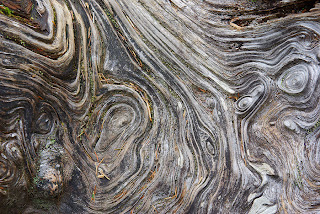
 Timber may be in the form of manufactured items ranging from pencils right through to home furniture to boxes and bowls. It is also naturally occurring in debris and branches too. A single branch or portion of bark will reveal crevices, moss or lichen, and a large variety of special hues and grains.
A photographer might want to take photos of the numerous textures and tones in a piece of driftwood using only the sepia settings on their camera, or they may instead rely on the color features to photograph the texture and different color patterns in something like Tiger Maple. Clearly, this means that a range of approaches is necessary, and choosing the right setup will become imperative to success.
So, how do you know the correct approach to photographing wooden textures? It all comesdown to your intentions. That piece of driftwood could be photographed along the sandy beach where it was found; with the different tones of the wood and the textures of the sand finishing and where you place things in the photo. This same piece of wood, however, might be brought into the studio and set against a concrete black or white background where its swirls, lines, ridges, and different hues will become the whole scene as an alternative.
Irrespective of the type of wooden textures to be photographed and the choice between color or black and white, it is significant to bear in mind that sharpness in texture is the ultimate goal. For this example we will come back to that piece of driftwood and consider looking at it “up close” and also examine it “au natural” with the digital camera.
If a photographer has decided to bring the wood into the photographic studio and get in close to the patterns and textures that have naturally occurred they are going to need to assess the accurate means to do this. Should they shoot with a macro lens or should they use the equivalent method as they would with up-close portrait photography? Generally, it is best to use the zoom lens (such as put to use in a greater part of portrait settings) to get a really good variety of alternatives. If you select macro for such a photo you are going to have to really battle with the lighting development, but the zoom lens will let the photographer keep at a distance and really flood the wood with a large deal of easily controlled lighting. This means that shadows can be designed when needed or they can be totally eliminated by the lighting setup too.
If we head outdoors to capture that piece of driftwood as it lies on the beach, we are going to have to think about the depth and value of its position in the shot. Is it wise that we stand above it and just shoot down into its patterns? Is it more interesting to juxtaposition it against the pale sands, the gray waters, and the pale blue sky? Should it be created in black and white? Some of these queries have more to do with a photographer’s individual preferences than anything else, but for the sake of this conversation we will opt for the color photograph of the driftwood.
 It is going to be an object in deep grey and black tones positioned in a location that is full of paler and softer colors. A photographer must use many of the same procedures for this shot as they would for standard landscape photography. This means they will need to make sure that their foreground and background are in the same focal depth as the subject, and they will need to make sure that the lighting of the setting is balanced. Implementing a polarizing filter can decrease some reflections off the the sea and the sands and keep the colors a bit cooler.
Evidently, these are just straightforward illustrations of how a solitary piece of wood can create an infinite series of photographic opportunities, but it is important for any photographer to keep in mind that their general surroundings are an ideal subject for experimentation.
For anyone considering experimenting with photography there are all sorts of possibilities for trying to capture various different textures. For instance, materials such as wood can often give the photographer with a variety of challenges and photographic examination. Regardless of whether the photographs will be shot in full-color or in the black and white style it is vital to make a well thought out “plan of attack” before beginning to capture the photos. This would incorporate visualizing the kinds of effects and consequences preferred and then working out a a small number of different approaches to shooting such images.
Let’s first consider photographs of wood or wooden objects. Because this is an organic material many people may not consider bringing wood into their studio setup for a photo session, but if we take just a second to contemplate how timber might look we can understand how it would succeed in the “sterile” or cleaner setting of a studio surroundings.
Timber may be in the form of manufactured items ranging from pencils right through to home furniture to boxes and bowls. It is also naturally occurring in debris and branches too. A single branch or portion of bark will reveal crevices, moss or lichen, and a large variety of special hues and grains.A photographer might want to take photos of the numerous textures and tones in a piece of driftwood using only the sepia settings on their camera, or they may instead rely on the color features to photograph the texture and different color patterns in something like Tiger Maple. Clearly, this means that a range of approaches is necessary, and choosing the right setup will become imperative to success.
So, how do you know the correct approach to photographing wooden textures? It all comesdown to your intentions. That piece of driftwood could be photographed along the sandy beach where it was found; with the different tones of the wood and the textures of the sand finishing and where you place things in the photo. This same piece of wood, however, might be brought into the studio and set against a concrete black or white background where its swirls, lines, ridges, and different hues will become the whole scene as an alternative.
Irrespective of the type of wooden textures to be photographed and the choice between color or black and white, it is significant to bear in mind that sharpness in texture is the ultimate goal. For this example we will come back to that piece of driftwood and consider looking at it “up close” and also examine it “au natural” with the digital camera.
If a photographer has decided to bring the wood into the photographic studio and get in close to the patterns and textures that have naturally occurred they are going to need to assess the accurate means to do this. Should they shoot with a macro lens or should they use the equivalent method as they would with up-close portrait photography? Generally, it is best to use the zoom lens (such as put to use in a greater part of portrait settings) to get a really good variety of alternatives. If you select macro for such a photo you are going to have to really battle with the lighting development, but the zoom lens will let the photographer keep at a distance and really flood the wood with a large deal of easily controlled lighting. This means that shadows can be designed when needed or they can be totally eliminated by the lighting setup too.
If we head outdoors to capture that piece of driftwood as it lies on the beach, we are going to have to think about the depth and value of its position in the shot. Is it wise that we stand above it and just shoot down into its patterns? Is it more interesting to juxtaposition it against the pale sands, the gray waters, and the pale blue sky? Should it be created in black and white? Some of these queries have more to do with a photographer’s individual preferences than anything else, but for the sake of this conversation we will opt for the color photograph of the driftwood.
 It is going to be an object in deep grey and black tones positioned in a location that is full of paler and softer colors. A photographer must use many of the same procedures for this shot as they would for standard landscape photography. This means they will need to make sure that their foreground and background are in the same focal depth as the subject, and they will need to make sure that the lighting of the setting is balanced. Implementing a polarizing filter can decrease some reflections off the the sea and the sands and keep the colors a bit cooler.
Evidently, these are just straightforward illustrations of how a solitary piece of wood can create an infinite series of photographic opportunities, but it is important for any photographer to keep in mind that their general surroundings are an ideal subject for experimentation.
Friday, December 21, 2012
Sunday, December 02, 2012
Monday, November 19, 2012
Saturday, November 17, 2012

Monday, November 05, 2012
Testing the new Canon EF 24-70mm f2.8l II USM

The other day I purchased the new Canon EF 24-70mm f2.8L II USM lens. After shooting with it for only 3 days, I can truthfully say that this is now my favorite canon lens. I had complete my research and understood what I was buying, but still, it really didn't stop me from having a few niggling doubts in my mind. Doubts about the $2,300 price was my major worry. I understood it would be a great lens, but was it really worth that much money? I’ve been a photographer for a few years now but that does not prevent me from questioning the price of digital camera supplies.
When I got the lens home I positioned it carefully on my writing desk. I studied at it for a second almost as if I was letting the purchase sink in. I began to unfold the box and carefully took out the lens. It’s not anything dynamic to look at. It’s just a lens. Okay, I will admit, I have the familiar “Red-Ring” fever. This is an affectionate way of discussing a Canon shooters enthusiasm to using nothing else but L series lenses. It describes me perfectly. Well, you can’t blame me really, they are incredibly beautiful and sharp quality.
So what’s so particular about this lens that I just must write down an evaluation about it? To begin with, the glass quality is nothing like Canon have ever done before. If you hanker after sharpness then this is your lens. I discovered that fstops at in the region of F11 give more clarity and sharpness than other lenses at do at F11.

It will detect the smaller fine points of a subject in very filtered lighting. This is one of the benefits of using a quick lens. Fast lenses work well in low lighting conditions. They do this because of the wide aperture. But open apertures are not as clear as smaller apertures, right? Right. So what do we do about focusing in filtered light? Does this lens still maintain the sharpness of the image? Yes it does. There is sharp detail at F2.8 even if you underexpose a photo.

I took a series of photos about the studio. I chose F2.8, no flash fill or normal room lighting was employed. I selected 6400 ISO to assist get as much lighting as I was able to. My shutter speed was about a 50th of a second. To my astonishment I found my test shots to be clearer and more sharp than expected. Clear and sharp in really low light? You bet they were!

Not only does the filtered light sharpness performance impress me, so does the reaction of the lens. I discovered that as I worked on getting good focus on an region of a subject it grabbed it and held strong. I didn’t have to keep getting the right focus and sharpness on a regular basis. Some lenses I have used in the past have had difficulty getting the right focus and sharpness, particularly when the scene was deep black or very dark grey. The lens held the focus quite sharply all the way to the edges. Admittedly I used a medium to small aperture to keep focus the entire image, but it’s the speediness and accuracy of how the lens mastered this shady subject that impressed me the most.

When I was doing my test shots, I did not use a tripod. It was pretty much hand holding the camera in really low light to see what would happen. I wanted to see how the lens kept focus and clarity. In a shady scene you would have definitely noticed camera shake.

I have discussing getting the right focus and sharpness in dim light. What about sensitivity and other performance issues? Well, aside from being fast to hold sharp focus, I am impressed by the absence of lens flare and no warping at the edges. In a number of lenses you find some bothersome distortion at the start or end of the focal length scale. For example some 24mm lenses can make the exact edges of the frame of the image look like they were photographed through a bit of glass. That’s because when the lighting goes through the lens, it begins to bend and creates a warping outcome. Not with this lens. I have not noticed any distortion at all. This is relevant to the 70mm end of the range also.

It seems to reproduce colours a lot better than any other lens I have shot with. So far all my vibrancy alterations have been very small. This is great for the reason that it means you do not have to spend a long time editing your shots. It just seems to pick up more true colour than my other lenses.
Receptiveness, sharpness, superior colour capture and optimum low light performance is what I love about this lens. It’s a bit heavy in weight, but all the L series lenses are. I am used to heavy gear now so it does not worry me in the slightest. I have yet to find out why this lens is so first-rate. Canon have really set precedent for the entire industry. I highly recommend this lens.
All photos are copyright by Amy Renfrey and must not be used without payment and permission.
Thursday, November 01, 2012
Sunday, September 09, 2012
How To Choose A Sturdy tripod
Many photo enthusiasts who seek the best tripod counsel are really seeking a way to find the best sturdy tripod for them. Not all tripods are designed for every single type of photography. Some tripods vary in heaviness, straightforwardness of operation and handling and some have additional attachments to accomplish extraordinary positions for the camera.
Deciding on a tripod originally requires a rock-solid knowledge of what you want and the reason why you want it. Do you like to take close up photography? If that is what you choose then you might want an extra attachment that facilitates to camera to be positioned down through the center of the legs of the tripod, right to the land. Other tripods do not encompass this element purely because they are designed for landscape photography. Landscape professional photographers need a sturdy, stable tripod to guard against movement of blustery weather. They also search for a tripod that’s not too weighty, in case the more adventurous photographer wants to climb a mountain peak to get the very best photo.
Deciding on a sturdy tripod means gaining the best results from a high-quality, concrete reinforcement whereby you can crumple the legs, fasten and detach attachments and put it away. This seems reasonably clear-cut until you look around at the various kinds of tripods on the marketplace today.
A number of tripods have a joy stick head. This means you can slot the camera on the tripod and manually move it from left to right with one control. You can swiftly let go of the handle and it will lock tightly into slot. Other tripods have a simple rotation grip. This lets the digital camera to move laterally only. If you want to shift the camera to move up and down, then you need to make adjustments to be able to accomplish that.
Different functionality is what we need to be conscious of. The best tripod, to me, is the one that is light weight, has effortless functionality and postures the digital camera safely in the place you put it. I had an old tripod that was good for starting out. When I started to be expert at taking pictures I became aware that the tripod was not able to match with the demands of my improving comprehension.
Every time I wanted to place the camera exactly up to the stars at night time, I was unable to. The tripod was not capable to keeping the digital camera in place without it slipping and sliding downwards again.
In order to choose a tripod that’s perfect for you, and I mean one that you are going to love for years to come, then contemplate ergonomics, effortless to lift and reposition and finally ease of function. All these things add to a very joyful and encouraging experience in your photography.
Deciding on a tripod is a very positive stage in your photography. It means you recognize light and how the camera needs to be rocky steady, particularly filtered lighting situations.
Sunday, September 02, 2012
Sunday, August 05, 2012
Understanding The Basics of SLR Photography
Understanding the basics of slr photography is not as awkward as it feels. Imagine the digital camera as a box that lets in lighting. On that box is a sequence of various controls. These controls enable you to let a lot or a modest amount of light in. The quantity of light coming in may ascertain how you obtain your photo.
Let's start with the auto function. The auto mode allows the camera to make the judgements for you. This allows you to just focus on taking the photo rather than worrying about the settings. The automatic setting is straightforward however it is not most ideal.
The basics of digital SLR photography are painless to learn when you appreciate how the camera controls lighting. Camera has control over the light two chief ways; Aperture and shutter speed. Your aperture is the opening in which you let your light in. Your shutter speed is how you organize the speed at which the lighting is coming in. You need both to be able to monitor the lighting.
Think of the camera as a human eye. Your aperture is the iris that lets light in and reduces so that light won't come in. The shutter speed is like the blinking eyelid. Your aperture is also known as F stop. F-stop is a numeric value that tells you how much the iris is open. If the cameras aperture is pretty wide then we say that it is a large aperture. A large aperture is a small number. For example F2 .8 is a very large aperture. It means the aperture is open very wide. It is comparable to how the iris acts in low light. The iris will open more to let additional light in so that we can distinguish things in the dark. Your camera is the same.
Aperture not only controls how wide the iris is but it plays a necessary role to play in depth of field. Depth of field plainly means what part of the photo is in focus. If every single thing in the photo is in focus then we call that a long depth of field. If there is only a small part of the photo that is in focus we call this a short depth of field.


A photo that has a long depth of field means that most, or all, of the photo is in focus. This is ideal for landscape photography.
When you have a wide aperture, F2 .8 for example, your depth of field can be short. If you have a small aperture such as F 22, then everything in image is in focus. (Light allowing of course.) I will explain this in a different article.
Shutter speed is intimately linked to time. Shutter speed is calculated in fractions of a second, seconds and then minutes. A number of cameras have a mode called “Bulb”. This will mean that the shutter stays wide open for as long as you keep it open. You can join a special cable to the digital camera and press it just the once. The shutter will open up. It will shut only when you compress the cable button. This will mean that you could have the shutter right open for an hour if your camera permitted.
Let's take for instance the evening sky. There is not much light at the human eye can notice. In this case we may want to leave the shutter open for 10 seconds or more. Then again if we want to take a photo of movement that is fast paced and "stop" the action, then we need to retain a very rapid shutter speed. This is where we get into fractions of a second. I have a Canon 5D Mark II and the shutter speed can go to 1/8000 of a second. This is super fast! I use a rapid shutter speed when I want to shoot the effect of water hanging in midair for example.


You will see different shooting modes on your camera dial. Not only do you have the automatic function but you have aperture priority, shutter priority, manual and possibly extra. Aperture priority creates the aperture for you. It means the camera selects what f-stop to use and you choose the shutter speed. Shutter priority works the opposite. This will mean that that the camera chooses the shutter speed and you do the rest These two shooting modes are okay but you still won't get the ideal result. The best mode to use is manual.
When you employ the manual setting you have the most control over your digital camera. You can set the shutter speed and the aperture at the same time. Once you become comfortable with how the manual setting works then you can start to have more control over light. Once you have most control over the light that is when your pictures begin to look gorgeous.
Learning how to use your SLR is not a heavy or difficult process. It actually a lot of excitement and fairly simple when you get the hang of it. The basics of digital SLR photography purely rely on your camera's ability to interpret light. This of course will mean that that you have to comprehend light as well! Once you understand how light works through your camera you can then select the shutter speed and aperture that creates the photographs that you desire.
Once you master the basics of digital SLR photography you can then progress on to using tools to enhance your light. These tools can enhance and manipulate the appearance of light in your pictures. Using the flash is one such example of this. But I will leave this to another tutorial.
Your onboard light meter is a very imperative part of understanding light. Your internal light meter is a small indicator that you see when you look through the camera. When you place your dial on manual then the indicator will be more to the left or the right.
Based on what camera model you have the scale means there is too little or too much light. When the indicator is sitting in the center of the scale it means the camera thinks there is just the precise amount of light and you may confidently take the photo. To be proficient to master light effectively just start shooting in auto and write down the aperture and shutter speed that the camera has suggested. Then change your camera dial to manual and choose those same aperture and shutter speed settings. You will observe that those settings may not be the best ones that you once thought. Sometimes at those settings can create an image that is under exposed. This is why it is imperative to shoot using manual.
Learning how to use your SLR takes a bit training. The most ideal thing about digital photography is you can always remove the photos you don't want. Do not be fearful of making mistakes. Mistakes are catalysts for discovering new things. Once you realize how your camera interprets light then you will be free to become the skilled photographer you've always dreamed about.
Wednesday, August 01, 2012
August 2012: Focus Comp Results
The winner of the August 2012 Focus Ezine Photography Competition has been announced!

Image copyright by Robin Tully.
Go here to see the results:
August 2012: Focus Comp Results
If you would like to take part in the competition then visit Focus Ezine
Happy shooting!
Amy

Image copyright by Robin Tully.
Go here to see the results:
August 2012: Focus Comp Results
If you would like to take part in the competition then visit Focus Ezine
Happy shooting!
Amy
Tuesday, July 24, 2012
Subscribe to:
Posts (Atom)