Tuesday, October 31, 2006

How To Get Better Digital Photos In Low Light Conditions Without Using A Flash

Digital photography is easy- when you have plenty of light and the conditions are ideal. But, as you may know, lighting conditions in digital photography aren’t always as we would like them. In digital photography its essential that we work with light as much as humanly possible otherwise disappointing results may occur.

One of my subscribers asked me how he could take digital photos at his friends wedding. He did not want to use the flash to distract the bride and groom during the time they were saying their vows. What he was asking me was how to get better digital photos in low light conditions without the necessity of using a flash. It’s a very good digital photography question. Good news it can be done. But like everything in photography there are advantages and disadvantages.

The flash is the biggest solution to low light digital photography. However the problem with this is that not all situations can benefit from using the flash. Not only does it interfere with your “moment” socially and artistically, but the flash can flatten out your digital images. This is especially true for a flash that is built-in on digital cameras. The built in flash (and a flash in general) has the effect of lighting your subject on the front only which compresses the depth in your digital photos. Compressed depth can really decrease the beauty of your subject in your digital photography.

This can be avoided to a certain degree, depending on your subject and by watching how your light falls. Learn how to see how the light falls on your surroundings and your mind will become adept at knowing what works and what doesn’t with the flash

Really, a good way to combat the problem in low light you can try using a higher ISO. Your ISO simply means the amount of sensitivity of light falling on your sensor. For example take traditional photography as a comparison to digital photography. Traditional photography ISO will be film sensitivity. (ISO in traditional terms works with film speed as well.)

The only set back in digital photography ISO is noise. If your ISO is perfect for the photo yet there is a significant increase in noise you can use software to sharpen up your digital photo. There are two good noise reduction software programs called“Noise Ninja” or “Neat Image”. If you don’t push the ISO higher you may find the problem with camera shake if a tripod is not in hand. By adjusting the ISO you will find that noise is better than camera shake. In digital photography noise will always be something to consider.

In digital photography, a higher ISO allows you to take photos in low light situations. In traditional photography you’d have to change your roll of film from. In digital photography ISO give you the opportunity to adjust a setting, rather than fiddle with changing film. This is advantageous if the subject is not going to stay around or you yourself are unable to stay for an extended length of time.

I’ll use another example. Let’s take for example you are taking dome digital shots indoors, like someone speaking, or playing an instrument. Perhaps the flash is not appropriate in this situation. In this case (which happens a lot in digital photography) you would simply adjust the ISO to a higher setting. If you set the camera on “ISO Auto” your digital camera will then detect that a higher ISO is necessary. Alternatively you can set the ISO yourself. This higher sensitivity can give you the opportunity of gaining the right exposure for the shot.

If you find that’s still not right, because your digital photo now has camera shake and you don’t have a tripod, you can in fact decide on the next top ISO which will then enable you to select a faster shutter speed.

Amy Renfrey

www.digitalphotographysuccess.com


EzineArticles.com Platinum Author


Monday, October 30, 2006

How To Sharpen Your Digital Photography Images

One draw back that digital photography has is that the images don’t have the same sharpness as traditional photography has. But this needn’t be a problem because there is a very neat trick you can use in Photoshop to help sharpen your digital photography images.

Lets start this digital photography lesson by looking at the digital camera. All digital cameras photograph images which have a normal pattern of pixels that make up this image. In some digital photography images a moiré effect is created. To avoid this, modern slr digital cameras come with an in built filter that givens a softer effect to the image.

When you are faced with having to sharpen a noisy digital photography image you’ll find that some photos are easier to sharpen than others. This might be caused from having a too higher ISO. The usual way of adding sharpness to a digital image has it problems too; it can actually increase the noise in your image quite a bit. To clarify this point, what is actually happening is the noise isn’t being increased as such, it’s being enhanced.

There is a way to sharpen noisy digital photo images without going into the noise itself.

To begin with its important to understand colour modes in Photoshop. The easiest way we remember colour modes is when we think of RGB mode. This is a “channel” of colours which are Red, Green and Blue. As I was taught by my good friend Lyndie Jeffry, there are more colour modes where your digital photo can be altered, adjusted and sharpened.

When I was first learning about digital photography Lyndie taught me that you can involve the CMYK mode which uses four colour channels. This stands for Cian, Magenta, Yellow and Black. (Yes I know “Black doesn’t start with a “K”.)

Lyndie ex
plained to me that the best one to use for this purpose is the L-A-B mode. LAB mode really just related to the 3 channels it uses. In a nutshell Lab stands for the individual channels. The “L” really means “luminance”, "A" the green-red aspect "B" the blue-yellow aspect. When working in LAB mode you can modify the brightness of your digital photo and keep the saturating and colours the same. The way this is possible is because practically no image information is depleted or lost when you convert to Lab mode. It also stays good when you convert back again, which is extremely handy. (Especially with highly valuable photos such as other peoples wedding photos.) Not everyone uses this, but it’s a neat trick with some digital images.

In some digital photography images you can simply choose to sharpen the L channel in LAB mode. By doing this much of the noise in the image is in the other channels that are usually not affected by this sharpening effect.

Now this may not work for every single noisy digital photography image you have. But in some situations it works very well. I suggest you try it to see the effect you give. I’ve used it a few times and it’s saved my you-know-what. So if you’re in a tight spot with a noisy image, give this a go, you might be surprised with the results!

By Amy Renfrey

>EzineArticles.com Platinum Author

Wednesday, October 11, 2006

How To Use Colour Effectively To Enhance Your Digital Photography


Digital photography has a lot of fantastic opportunities. When I say “opportunities” I mean artistic opportunities. You see succeeding in digital photography goes way beyond just knowing how to take a digital photograph in the technical sense. You see need artistic ability and knowledge too. Digital Photography, if applied artistically, can open up the doors of creativity for many, many years to come.


The first thing I recommend to start with if you are a serious digital photography enthusiast is to understand how colour works. When you understand how colour works in digital photography you can then use different colours to create very different feelings and emotions in the photo itself.

Colours such as blues, greens, mauves, etc are introverted colours and can often give your photo different feel to reds and yellows. For example think of a field of green with a tree that has purple flowers. It tends to represent, and even induce, feelings of tranquillity and calm. These, in digital photography, are regarded as introverted colours.

Colour such as yellows, red, oranges and pinks can often instil an energetic feeling. For example think of fruit such as red berries, oranges or cantaloupe. These are simple examples, but think of the feelings that these colours create in your digital photography.

This is another reason why not all things look as good in black and white, and why some things in fact do look better in black and white. (More about that another time. For now lets focus on creating colour that enhances your digital photography. )

In a very simple sense if you want to create a sense of stillness and calm in your digital photography then aim for subjects that have these colours that are more towards the blue and green end of the scale. And the same goes the other way too. If you want to have a bright energetic feeling, then go for colours that are warm and vibrant.

Contrasting colours in digital photography work very well too. Primary colours together such as blue and yellow seem to look great side by side, or one as a back ground and the other as a main subject. For example I took a photo on a beach with a bright yellow sign against a blue sky and a blue ocean. It gave the feeling of energy as well as having the calmness of the blue. Being a contrasting primary colour the yellow was not absorbed by the blue, it was the opposite. The yellow sat nicely against the blue as the focal subject.

When doing digital photography, think about the colours you are creating in your photo. Try to aim for digital photos that have colours that look good together, and do not clash like hot pink and bright red next to each other for example. If you want extrovert bold colour in your digital photo, don’t overcrowd the viewer with too many bold colours. In digital photography it works best if you have the main subject having the bold colour, rather than multiple points of bold colour in the background for example.

Choose good digital photography subjects with simple composition that have colours that work well to compliment each other. And remember digital photography is all about creating a feeling. And working your colours together well will enhance your digital photography images ten fold.

If you want to learn more about working with colour effective in digital photography, just go to www.digitalphotographysuccess.com

Best wishes,

Amy Renfrey

EzineArticles.com Platinum Author

This photo is copyrighted by Amy Renfrey.

Wednesday, September 27, 2006

Love Digital Photography? Then Choose Your Camera Carefully

If you love digital photography, then you will find that one of the first questions that pop into your head will be "which digital camera is right for me?"

No matter where you go and whom you ask in the digital photography world, you will not find a single answer. You see in digital photography choosing a camera is about as personal and individual as choosing a car, or a career. And just like a car or career, a digital camere should give you satisfaction and great results with mininimal headaches.

To get started on working out which digital camera is right for you here's a good start:

1. How much can you afford to spend?

Hey, we all want the latest canon Eos 5D, but lets face it not all of us have that money to spend our digital photography passion. Some of us have only $500, or $1000 or less. Cost is a huge factor in digital photography because you'llfind, like anything the higher up you go, the better lens and functionality of the digital camera. That doesn't mean to say the $500 is rubbish compared to the $1000 digital camera. It just means there will be less things it can do.

2. What do you want to do in digital photography?

Its great, in digital photography, to have the latest "whizz-bang" lens with all the bells and whistles, but if you just want to take family photos at home, you will probably find that the lens on most semi-pro digital cameras are pretty good for basic digital photography techniques. However, on the other hand if you want your digital photography to be complete with telephoto capabilities, macro functions and everything in between, the semi-pro digital camera's lens won;t be enough. Sure it'll have a basic optical zoom and a "close up" setting but to get professional digital photographs, you'll need attachable lenses. And you can only attach external lenses onto a digital slr, in other words a professional digital camera.

3. How durable do you need the digital camera to be?

If you want your digital photography experience to be complete with long life battery capabilites, a sturdy body and light weight for easy handling then this needs to be assessed accordingly. Its not good having a digital camera that's sensitive to a lot of handling if you want to use it at football games, for travelling and for anything else. Choose a body that's pretty sturdy and where you can easily and safely store it out of harms way.

4. Match and Challenge

Its no good in digital photography, if you buy a digital camera that has settings and buttons you have no idea what they mean. An associate of mine bought a Nikon D70 about 3 years ago and his photos were terrible. He only bought it because it had just come out at the time. But he spend top dollar just to have the image of a good camera. Digital cameras have many functions and settings, so make sure that if you are going to get a professional digital slr camera, that you know how to use it. Or else aim for something smaller and easier to understand. If you intend to "upgrade" your digital photography knowledge, then great, go for the complex camera, but if not, don't get something you really don't need; match your knoweldge to the digital camera.


5. Read Digital Camera reviws

The first thing I did when I decided to upgrade (I upgraded as my photographic skills and understanding increased) was head straight to reviews of digital cameras. In a nutshell I wanted to know others peoples experience with certain cameras. I made an assessment that I wanted the top lenses in a camera- that was very, very important to me. So I looked at the Canon D series. You see the people in the shop will never tell you anything else but how that camera is THE one that will solve all your photographic challenges. But don't fall for it; they're not photographers, they're retail people. They are still valuable but they are not an expert in what you are looking for.

Okay so that's a good start with your digital photography. Just remember to asses what your digital photography needs are and work from there. Don't be swayed by opinion, be condfident in your own abilities.

Best wishes,
Amy Renfrey

www.digitalphotographysuccess.com


EzineArticles.com Platinum Author

Tuesday, September 26, 2006

Digital Photography - People In Black & White

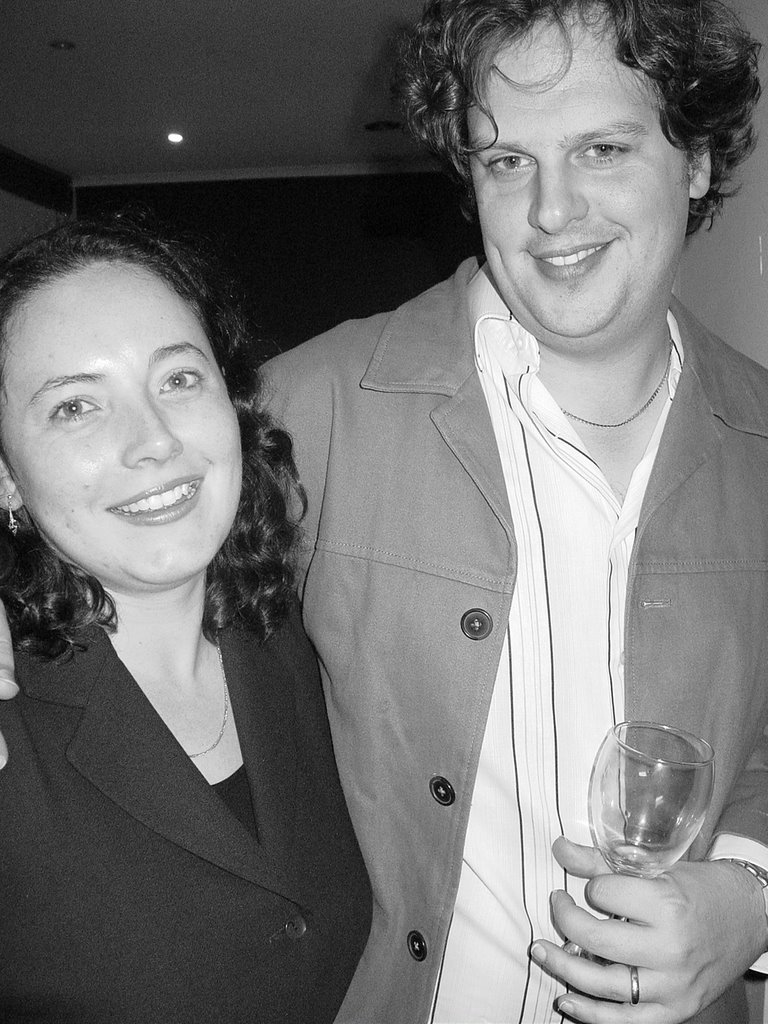
People photographs in Black and white are often the best and most visually pleasing. If you’re using digital set the camera to black and white mode, which is the easiest, or you can add the black and white look in digital editing software via converting selected photos to grey scale mode. (Believe me, it’s a lot easier to simply change the settings on your camera if you can.)

Why is it so popular and appealing? What does it offer the viewer?

Black and white people photography offers you something that standard colour does not. A good black and white people photo can really create a positive and gentle feeling of that person. They become more appealing, and easier to look at that sometimes colour. We can see another side of someone’s personality with black and white photography. The enhancement of grayscale in a lures us into a natural focus on peoples good energy, and if two people, their relationship to one another.

People look fantastic in black and white and you don’t need colour to create a great photograph. The absence of colour gives the photo of your person more impact. Rather than purely noticing skin colour we tend to look at the shape and tone and depth of the face so much more. We tend to look at the detail. It’s like we are forced to notice another side of things, such as form. And when you notice form a lot more, it gives you a different feeling and impression about the subject. Black & white photographs have an enduring, timeless quality – and that's why the medium is so fascinating.

Inside every colour digital image there's a black & white masterpiece

With their timeless and classic look, black and white pictures of people work very well. Let's take a look at ways you can create your own black and white masterpieces. You will notice in many magazines it seems that all the classy photographs are in black and white. Black and White....In fact there is a magazine called exactly that, “Black And White” you can find information about it online at http://www.bandwmag.com.

It is exclusively black and white photography. If you are serious about black and white photography I suggest you buy a copy of this magazine and look at it from a technical and artistic point of view. Black and white often allows more scope for creativity than colour.

Strong visual impressions and emotional intensities can be enhanced by black and white photography. Sometimes no matter what you do to a subject, whether it is lighting alteration or composition, black and white just turns out better than colour.

Because black and white photography reduces everything to shades of grey, the attention of the viewer is drawn more to the underlying structure of tone, shape, texture, line and form, rather than the surface structure of the content. We tend to notice form in a stronger visual sense.

I recommend for every colour picture you take, quickly flip the settings to black-and-white and practice this way. It's a great way to get creative quickly and to look at an alternative light, a new black and white reality.

For a start, take some close-up shots in black and white of simple objects, such as the watch. But don't limit yourself - also try people. Black and white shots of people can be fabulous.

Try close-up shots of someone in your family, or even your self. At times when I needed a subject with which to practice and no one else was around, I simply pointed the camera at myself; although I don’t love taking photos of myself it was useful practice.

Best wishes,
Amy Renfrey

EzineArticles.com Platinum Author

Click here to learn about how to get sensational photos with your digital camera.

Monday, September 25, 2006

How To Photograph Your Items To Sell On EBay


Digital Photography and Ebay; there are a few things you must know. When selling items successfully on Ebay becoming good at digital photography is a must. And the first point of call starts with the photograph. The first thing to remember that digital photography done right can pave the way to more bids, higher bids and repeat purchases. It’s all in the digital photography.

Too many times you will see an item not getting many (if any) bids. If you look closely at the digital photograph, you will see the digital photo is very poor. When I say “poor” I mean often too dark, has a contradicting background, and too many distracting, irrelevant items around it.

Let’s take for example the lounge suite. I have seen two types of “lounge suite” photos, and they both get a small amount of bids. (A small amount of bids usually means not enough interested buyers to push the bid price up- hence not enough money is received by the seller. When all they had to do was get their digital photography right in the first place.)

The first type of digital photo I have seen is one of ‘irrelevant background’. The lounge suite is carted outside and placed on the lawn and photographed outside. One of the secrets to getting excellent digital photographs is your background. The number one rule in this instance is to create some relevancy and consistency between the main subject and the background. People don’t sit outside on the lawn in their lounge suites. Your digital photo of your lounge suite will create much more interest if its places in the background environment is relevant- ie the lounge room.

The second type of digital photo is too dark- only using the flash indoors. What’s wrong with turning the light on to get light onto the sides of the lounge suite? The flash will only light up the very front of the lounge, not cast a beautiful even light over the sides too. Its important in digital photography to be very conscious of light, and lighting up the WHOLE photo, not just the front of it.

The third type of digital photo is one where other things are in the photo. These “other things” have nothing to do with creating a better look and feel for the lounge suite. These items are distracting and irrelevant. One killer to a good digital photo is having something in the back ground, or foreground, that has absolutely nothing at all to do with the main subject, i.e. a painting hanging on the wall behind the lounge suite.

Digital photos like this will often attract questions from potential bidders “does that painting come with the lounge suite?” To which the seller gets annoyed and says “no, lounge suite only.” To which the potential bidder thinks “well why the heck is it in the photo?”

Good point. Why IS that painting in the photo?

So remember, keep your Ebay item well lit, keep your backgrounds relevant and keep your distraction to a bare minimum. Once you apply these few things you will be well on your way to creating sensational digital photography for Ebay.

Best wishes,

Amy Renfrey

EzineArticles.com Platinum Author

If you want to learn how to take sensational digital photography go to www.digitalphotographysuccess.com

How To Get Beautiful Autumn Digital Photos


Digital Photography and autumn (Fall) sometimes feel as if they’re made for each other. Autumn is natures clever way of providing us with a festival of colour. It’s a digital photography dream to capture to magnificent colours of the trees at this time. The blood red, the warm, vibrant yellows and the bright greens create the most magnificent contrast and complimentary colour forms so very pleasing to the eye. It’s almost as though nature has come into its own beautiful confidence all of a sudden.

So how do you capture the magnificence?

Firstly you must remember that all good digital photography is based on light. Your light will fall differently on things after summer. The light of summer is great, but it can create hard contrasting shadows. Now, with autumn, the light seems to soften, and depending on which part of the world you live in, this softening light can offer you some amazing digital photography opportunities not to ever be missed.

The main thing to remember here is that the colours contrast well. To create the bold contrast you can pick a clear day with blue sky and have a red and yellow autumn tree against it. You can also go macro and get a digital photo of contrasting colour in leaves; that also makes a nice digital photo.

Autumn provides many warm shades of brown too. The brown tones complimented with darker shades of red and yellows can create a delicate and almost feminine feel to your digital photography.

Don’t forget to use the autumn colours against not only blue sky but dark pavements, and pathways too. The dark brown/black of a pathway with vibrant dotted colours of red and golden leaves can create some stunning effects pretty easily. Just get your composition right and leave the rest to nature.

Now get that camera and go outside!

Best wishes,

Amy Renfrey

EzineArticles.com Platinum Author
If you want to get your digital photos looking like they’ve just been taken by a professional, then just go to www.digitalphotographysuccess.com

Picture copyrighted by Andrzej Pastuszak.

Sunday, September 17, 2006

How To Photograph Babies & Toddlers - Indoors & Out

Digital Photography is one of the best and most fun activities to do. And this especially applies to children. And the younger, the more your digital photography really means something. Your digital photography almost becomes a necessity when you have children and want to photograph them. But just how do you get the ‘ideal’ digital photos of toddlers and babies? And how do professional photographers do it? What’s their secret?

Firstly the number one secret is to create an environment whereby the young child is playing, or is feeling happy and relaxed. This can mean setting up lots of toys at home on the living room floor, or if you are in a social situation (Saturday afternoon bbq for example) then perhaps interacting with other children or their own activities are the base starters for getting beautiful digital photos of your children.

Secondly you need to address lighting issues in digital photography. This applies to digital photography with toddlers and babies especially because they move (in artistic photographic terms) so fast. Let’s talk about this, because this is a really important point.

At home, you will be faced with indoor lighting. Indoor lighting in digital photography and toddlers and babies is a little tricky, because the kids move fast your shutter may not give you good, clear pictures because of the low light. To compensate for the low light inside the flash might cause a problem- it might be too bright and distracting. And the point is not to distract them- you want as relaxed and natural as possible. A bright flash going off in their small eyes can be overwhelming.

Make sure you have as much light as possible. Turn the over-head light on, place them under a window with sunlight coming in, and even use a standing lamp if necessary. Then adjust the shutter to a setting that allows for fast movement. And use the flash only if you have to.

Digital photography outside is not so bad, but it does have its problems too due to hard light. In case you are unfamiliar with the term, hard light means harsh, sharp sunlight that creates dark shadows, leaving a stark contrast between light and shadow in the one digital photo. In this case it can feel like its impossible to get any even, balance light over the scene.

Here’s a pointer to combat this:

If your child is outside with the sun behind them playing on a rug, for example, you’ll find the camera makes them look too dark, or the light around them blaringly bright. In this case you can let the camera create the darker shadows and use the flash on a low setting so the flash can fill in the darker areas. This is commonly known as “flash-fill”. It’s just a word meaning the flash lights up the shadowed areas. In an outside situation the flash won’t be as bright or distracting because it won’t feel as intense to the child, but do try to not over do it.

Last, but most definitely not least, you’ll need to work out what type of picture you want to create. If you want a fairly emotional picture that shows how beautiful they are, then decide on a fairly close angle. This means filling the frame. “Filling the frame” is a word that simply means; “don’t have any irrelevant, things in the photo that distract the eye.”

So there are a few things to think about with your digital photography. If you want to know more how to get clear digital photos with lots of sharp detail just go to www.digitalphotographysuccess.com

This photo is copyright by AmyRenfrey.


EzineArticles.com Platinum Author

Saturday, August 19, 2006

How To Take Perfect “People Pictures” In Digital Photography


One of the things people ask me most about digital photography is how to take perfect “people pictures.” Digital photography is great for people because you can simply delete the ones you don’t like, and show them, on the spot, what the digital photo looks like.
In any digital photography session, whether it be portrait photography or photography at a birthday party it takes prior knowledge to getting “perfect people” digital photos.
So here are the digital photography secrets to this type of photography.

People Photography Secret number 1:

Horizontal vs. vertical

Most people who do digital photography of people hold the digital camera horizontal. Not sure why this is; most likely because the digital camera is built that way, but really you can do well with holding the camera vertical as well. Horizontal digital photos of people are ok, but work best when taking a group photo rather than a single photo of someone. A vertical angle for your digital people photo can give you a great composition for close up and it tells you a lot more about that person that a horizontal will. Horizontal angles in digital photography of single people tends to increase the amount of potential clutter and irrelevant objects in the frame.

People Photography Secret Number 2

Where to put your people in the frame

In digital photography, pictures of people work best by creating some interesting composition. Don’t put your person in the center of the frame just because everyone else does their digital photography that way; be unique and creative and you’ll get a much be result. And good digital photography is all about capturing that special moment of someone to last and reflect something positive about that person, right?

People Photography Secret Number 3

Go Candid.

Personally, in my experience as someone who does digital photography for a living, I can tell you that candid digital photographs work so much better then staid photos. It’s so much better to capture someone just as they laugh at a funny joke, or see their friend for the first time in a while, or even talking quietly to others, it so much more interesting and creates a positive photo of someone than a shot of them looking into the camera with a posed shot; hey anyone can do that. But do take that digital photo with them laughing and not knowing they’re being photographed captures a side of them that not everyone sees. It’ll show them in good spirits and create a positive image for all those who see that digital photo from now on. Get creative with people photography; try black and white and sepia. And even try taking the digital photo of them doing something they love, like playing an instrument for example.

Good luck!
Amy Renfrey

If you are totally serious and really want to learn proper people photography just go to www.digitalphotographysuccess.com right now for ways to bring your people pictures to life...

EzineArticles.com Platinum Author


This photo is copyrighted to Amy Renfrey.

How To Photograph Landscapes With Your Digital Camera

If you’ve ever wanted to do landscape digital photography then here is some good news. You don’t need powerful digital photography equipment, but what you do need is a good lens.

Sorry to say but a lot of (I didn’t say all) digital cameras can’t take clear and “big” landscape photos because they don’t have the lens that enables them to do it. Digital photography has come along way in recent years and is racing up to traditional camera quality. Due to this fact landscape digital photography still needs to be done with a good lense.

So what is a good lens for landscape digital photography? A wide angle is a good place to start. Like a lot of things in digital photography this rule is not set in stone like the ten commandments, but it will help you a lot if you have a lens that is able to take mountain and nature scenes with a good view.

Think of a lens as a pair of glasses. The digital camera has the eye and the eye needs glasses. Okay, bear with me here….

The eye needs special lenses to see things from certain angles. It needs a pair of binoculars to see far away distances up close (telephoto lens), a magnifying glass if it wants to see detail up very close (macro lens) and it needs to see a ‘wide’ if it wants to see a scene clearly (wide angle lens.)

Okay now I know you are not a silly person and you can understand more technical things that that! I am just meaning that if you want good, clear detail in your landscape digital photography then you need to assist your digital camera to do it. And a wide angle is exactly what it says; it gives you a wider angle to shoot mountain ranges, landscapes, seascapes and even astrophotography. (The stars in the night sky.)

It’s easy to get landscape digital photos, but without the right lens its not easy to get good, sharp and clear digital landscape photos. If you won’t have the right lens then your landscapes will be flat lines with no depth, and you’ll be frustrated. I know, because this happened to me. Until I understood that your digital camera acts like the human eye and sometimes needs a little help for it to “see” what you want it to see.

If you are not sure if your digital camera can even take good landscape photos, then try it out. Get yourself to a mountain range or even cityscape and take a few different angles. If you have a camera that has an adaptable lens then you will be thankful for ever! If not, don’t despair, you can always hire dlsr’s from camera stores for a pretty reasonable price. It will be entirely worth it for that brilliant, clear, sharp detailed landscape photo you can hang on your wall for the rest of your life.

Good luck!

Amy Renfrey

If you are serious about landscape photography and want to know how to take suberb, clear digital images of your beautiful landscape then just go to www.beautifuloutdoorphotography.com

www.digitalphotographysuccess.com

Photo copyrighted by Lyndie Jeffrey. Landscape Photographer of the year winner 2006.


EzineArticles.com Platinum Author

Wednesday, August 09, 2006

Digital Photography On Vacation

Going on holidays or vacation to get away provides one of the best digital photography opportunities that must not be missed. Most people take the usual digital photography “snaps” without really looking an examining their environments first.

The normal holiday digital photographs are taken with hard light over exposing parts of the picture, and the digital image is always the same. One or two people standing near a monument with the usual holiday clothing on…it’s the same ting over and over again.

If you want to get interesting digital photography opportunities then firstly the thing to do is not do what everyone else does! So let’s looks at ways you can make you digital vacation photos interesting so that you can use them to hang on the wall or give away as postcards when you get back, or greeting cards. Ahh, what the wonderful world of digital photography can do for the soul!

Firstly the get your digital photography really interesting and stimulating when going on holiday is to research as much as you can about the area you are going to, and, the season you are going in, and what the temperature is likely to be. This is called digital photography preparation; not just holiday preparation.

Discover what things you will be likely to visit. Are you going to a fairly established area, such as old churches that have been around for centuries and you are aiming to get your digital photography experience reflecting the beauty and the art work in these old buildings?

Or perhaps you are having an action holiday with hot summer days, beaches, hotels, lying by the pool….in that case then your digital photography will be a completely different experience. Your digital photography needs will be very different and require different things.

If you perhaps want to do a bit of both; churches in Rome then Hawaii on the flight back then you have an even more interesting set of digital photography requirements. Most digital photography professionals may take two cameras, one digital camera for one scene or situation and a traditional camera with film for another situation. But being an enthusiast, you don’t have to go to that length; there are some things you can do.

The reason I say to investigate further about what it is you really want to see when you are on your vacation is to see what kind of light you will be working with. If you are going to see some beautiful European churches in winter time then the light will be very different from the light on a beach in summer time in Hawaii. Digital photography is the type of activity that requires you think about what you are doing first. Always think about your digital photography in this way because light can be very different in other places and especially if you are going to a different season.


Good luck!

Amy Renfrey

www.digitalphotographysuccess.com


EzineArticles.com Platinum Author

Tuesday, July 25, 2006

The Secret To Digital Photography Part 3

Okay now I know you are wondering what the third secret to digital photography is....

I think I'll wait till next week to tell you....just kidding! I'll tell you now.

It’s technical ability. Is that all? You say. Well my friend, learning what things mean what on the camera feels like it can take a lifetime, so here are some simple ways to help you learn to refine your digital photography skills. Once you have the artistic side of digital photography covered, you can then fine tune the artist in you and work that camera.

Just before I explain the digital camera in more details, firstly I want to say this about digital photography; you need to learn the technical aspects of the digital camera so that you can become the master and controller, not the other way around. When you first start out in digital photography it feels like you are at the whim of the digital camera and it controls your digital photography. Once you start learning what does what on the camera, you'll find that you become the master and controller.

Lets look at the common terms in digital photography and simplify them into plain English. (God knows you will be forever looking at the camera manual thinking "what the heck does that mean?" So read this instead...)

Hey the only thing I knew when I started digital photography 6 years ago was what a lens cap was so if you don't know the basic stuff please don't feel bad. That's why I am here; to help you.

Firstly to be good at digital photography you must first understand how the camera works. Your digital camera is a brilliant device and is very much like the human eye. There is an "eye lid" and a "pupil". The eye lid blinks open and shut- this is how the shutter speed works. The pupil- how far the lens opens to let light in is the aperture. The flash works as a torch light. It is a direct source of light to provide more light where the camera needs it. You can use this anytime of day or night.

So with that basic analogy we can define some meanings. Don't get too stressed about trying to remember these things, just remember the basics of how the camera works to begin with, then eventually these things will become more and more attainable to you.

Exposure: This means, basically, the total amount of light falling onto the sensor in your digital camera. The way this is "measured" is by calling the level a "value." Or in shorter terms for digital photography its called an "E/V". The more E/V registered on your digital camera the more light is getting in. Think of it as a higher E/V means a higher concentration of light going in the camera.

On my Sony brick...sorry I mean my old Sony Cyber shot, if I take a sunset shot and need to have more light in the picture then I'll increase the E/V to +2.0. If it is a sunny day, like a bright summers day and I want to stop the picture from being overexposed and reduce the amount of light coming in to the digital camera, I'll reduce the E/V to -0.3 for example.

These numbers simply pertain to my camera, so don't worry too much about them, but just understand the principle. The lesser the E/V number the less light. In effect you are making the pupil smaller so less light comes in and vice versa.

Aperture: The aperture means the actual size of the opening of the lens. It's a lot like exposure but relates to size more than anything. Think of this as the opening itself and controls how much light gets into the cameras sensor.

Shutter speed: This is the eyelid, if you like. It’s the speed in which the eye lid blinks open and shut. A fast "blink" means you can freeze time and capture fast action shots such as a person running without blur, or cars racing without blur. So really it is the measurement of how long the shutter is open when the digital photo is taken.

You will see sometimes 1/125th or 125 for example. This means that the shutter is open for 125th of a second. The higher the amount of time, the longer the shutter stays open. So in digital photography picture-taking terms if you want a blurry effect then leave the shutter open for a second to ten seconds and see the difference in effect. The quicker the shutter is open, the more you will capture, such as race cars or peoples fast action suspended in time without blur.

Lag: I just know this as "pain in the butt". It’s the time delay between when you press the shutter button and when the camera actually takes the photo. It's been the problem with digital photography until recent years when the dlsr cameras have almost reduced this altogether. The higher priced cameras have very little lag.

Flash Fill: This is a saviour for day photos where there is over exposed and underexposed areas in a digital photo- in the same photo. Imagine a bright sunny day and you take a photo of someone on the beach with the sun behind them. The digital camera will actually "see" the bright sky and keep that in focus and reduce the light on the persons face. To combat this you can use the flash to compensate for the camera "forgetting" about the persons face. Its the best thing since sliced bread. This is how you get shots of people blowing out birthday candles and are able to see their faces clearly.

Rule Of Thirds: When I first started digital photography I thought ; "Gee I mustn't take that picture unless I abide by this principle." Well that didn't last long. Now I don't even think about it. But this principle in photography should be called a guideline, not a rule. However when you are just starting digital photography its great to learn- it really helps you.

This website describes it better than I can.
(www.digitalpostproduction.com/Htm/Features/
DigitalVideoGlossary.htm)

"This rule takes our rectangular shape and divides it into thirds. The key elements or objects in a composition should fall on one of these thirds lines. The one point on our photograph where the viewers' eye comes to rest should fall on one of these lines where both a horizontal and a vertical line come to rest."

Okay so that is about it for now. Just focus on those things in your digital photography and the rest will come with time and lots of practice. The best way to become good at digital photography is to let your heart take over, just relax and clear your mind and allow the artist within you to surface and then things will fall into place.

There is more in "Digital Photography Success" of course so if you want to have a look and learn more about how to become skilled in this highly addictive hobby then go to www.digitalphotographysuccess.com

My best to you,
Amy Renfrey

Next week I'll discuss the tricks and tips to getting clarity in your digital photography when you have a short depth of feild. :)


EzineArticles.com Platinum Author

Monday, July 24, 2006

www.beautifuloutdoorphotography.com

To discover all the professional digital photography landscape secrets, click here.

The Secret To Digital Photography Part 2

Last week we discussed light as being the first secret to successful digital photography. This week we are going to examine the second secret to digital photography, and that my friend, is composition.

Composition in your digital photography, if you like, is really your shapes, lines and forms all working together in your digital photo. Its not just these working together, its really all your shapes working together, complimenting each other to create a visual balance. So what do I mean by this?

Example:

A seascape photo. The reason why this digital photo works is because the lines of the clouds work to compliment the horizon line of the ocean. The direction of the clouds creates lines and forms. These forms in this digital photo work together to create a balance of symmetrical shape with the line of the ocean. See how these things work to create symmetrical composition?

The key also is to keep your composition simple. Don't overcrowd your digital photo with unnecessary and irrelevant forms and images that have nothing to do with the story you are creating with your digital photography.

Its this simplicity of lines and forms that create good composition. You will notice that the best photos are simple. There is no clutter, no distraction, no irrelevance and everything works together. The outer parts of the digital photo all lead to a single point of focus- and this is GOOD photography.

So whenever you embark on digital photography just remember; make sure the light is evenly spread across your digital photo and make sure you keep the lines and forms really simple. The less clutter the better.

I took this digital photo to show you that you can create good photos using a basic digital camera if you apply the 3 secrets to digital photography. It’s just a simple one, but just because you don't ideally have the latest dlsr camera doesn't mean your shots can't turn out.

Now, on to secret number 3.....

Good luck.

Amy Renfrey

www.digitalphotographysuccess.com
www.beautifuloutdoorphotography.com

This picture is copyrighted to Amy Renfrey.


EzineArticles.com Platinum Author

Tuesday, July 18, 2006

The Secret To Digital Photography Part 1


It’s very exciting starting digital photography. You might even invest in your first digital camera; it’s really a world unknown until you learn some digital photography tips and perhaps even go on a few day outings and take several digital photos.


But really, what does it take to get your digital photography from frustrating "why-won't-it-turn-out" to "wow-it-looks-like-a-professional-digital-photo" standard?

That's easy; there are three secrets to digital photography that you must know or you might be frustrated for a long time. So here is the first secret:

Digital photography secret 1; Light

It sounds pretty simple doesn't it, almost too simple to be a 'secret'. But I tell you its not. If you understand that in digital photography your light is one of the top three elements to success then you will be on your way to creating digital photos to be proud of.

Always aim for even light over your digital photo image. If you have the whole scene and the whole subject well light so there are no hard shadows making it difficult to focus on then you are on your way to success.

You may have heard that cloudy days are a key element to a digital photography- my response to this is "most definitely but do you know why?" The whole issue of light in digital photography is getting even light over the scene as I just mentioned. You see sun light during the day can either work as your best friend or a complete enemy. It can create huge patches and lines of hard light that create and cast shadow over your scene or subject making it impossible to create a good digital photo.

You can have sensational digital photography images if you just know how to work with the strong sunlight. Have your light/sunlight cast over the front of the your subject so your digital image has evenly spread light on it, so no hard shadows or lines are created. This is precisely why digital photography can be enjoyable on cloudy days; because the light is evenly cast for us, making our jobs as digital photographers easier.

So make sure that when you are outside doing digital photography that the light is evenly spread over your subject and don’t be afraid of cloudy days. And don't worry about the sun; it’s all in the positioning of the light and avoiding hard light that is a fundamental key element to successful digital photography.

Cheers,
Amy

You can go to my website to learn more about digital photography. www.digitalphotographysuccess.com.

(Please copy and paste this url into your broswer. Blogger seems to be having trouble with links today.)

EzineArticles.com Platinum Author

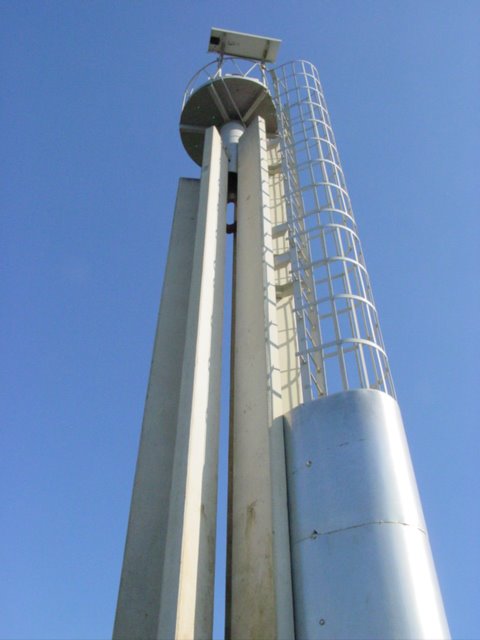
The picture in this article is copyrighted to Amy Renfrey. If you want to use it, you must ask me first.
Wednesday, July 12, 2006

Why Some Digital Photography Images Work Really Well And Why Others Don't


Have you ever wondered what secrets professionals know about digital photography to make their digital photos look so good?

I used to find it really frustrating why some people seemed to posses a "look, point , shoot" process with their digital photography. What did they know that I didn't? How did they create digital photos, beautiful digital photos mind you, and for me it seemed really hard. And they never wanted to share any tips with me.

I can tell you one thing that’s so incredibly important with digital photography. And that's simple composition. At first my digital photos were too busy- they had things in the background that were distracting, over exposed and under exposed. There were some aspects of my digital photography that now, I would not even show you- the early photos were too bad.

Now of course going "pro" it’s a whole different story. I have to get it right otherwise I don't eat! It sounds dramatic but really when you are put under pressure you have to make sure your digital photos are right- in all aspects…..especially your composition.

Let’s imagine a professional photo of a landscape. You have seem them before so think back to the last time you saw a professional landscape photo and think what it was about the photograph that appealed to you.

I can tell you it was a series of things like light, lens, angle etc, but one main, important thing about it was probably the simplicity of the composition. Not too much in the photograph, things are in perspective with each other, the angles and lines compliment each other.

That's exactly what you need to aim for when doing your own digital photography. Keep what you are taking free of clutter, use good lines and angles and if necessary turn to the rule of thirds. All these things will enhance your digital photography and all make up your composition.
Simple composition is the most under estimated artistic influence in digital photography. You will find that the professional landscape picture has painfully simple composition as its fundamental artistic make up. And you can do the same. Keep it simple with your digital photography and you start to see amazing results.

Keep up the good work,
Amy Renfrey

www.digitalphotographysuccess.com

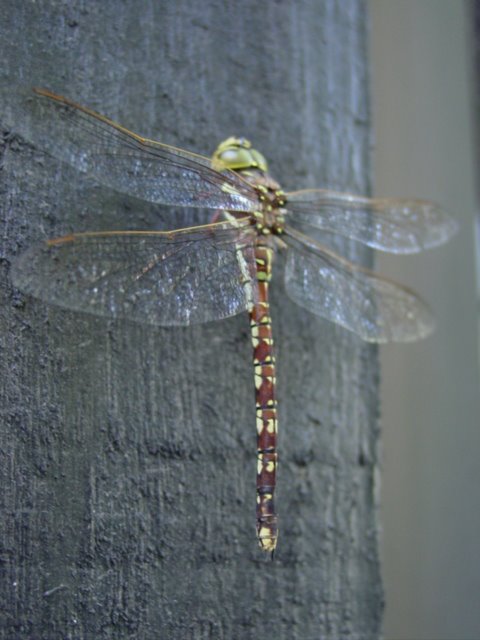
This picture copyrighted by Amy Renfrey.

www.digitalphotographysuccess.com


EzineArticles.com Platinum Author

Wednesday, July 05, 2006

A Digital Photography Tip- The Secret Of Clear Digital Images

Recently I’ve been getting a lot of questions about clarity. This leads me to the answers about lenses. You know if you do not have a good lens you do not have a good photo- generally.

The reason I say that professional SLR is much better than a prosumer camera or a point and shoot is not because of my desire to look “pro” when I take photos its because of the amount of control you have over the photo. You can control the light so much more; you can control the exposure and the general aspects of the image. And with this freedom comes the choice of getting the clarity via the lens.

To gain the ultimate freedom in picture clarity first of all you need to know what lens does what.


Fixed focal length lenses

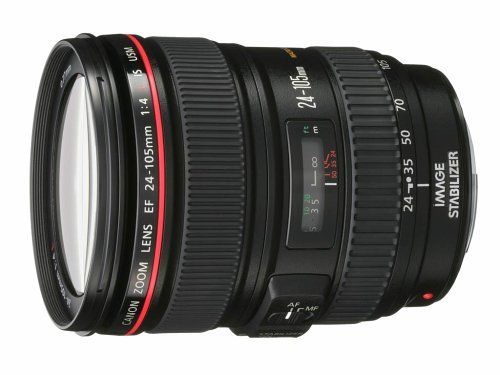
A fixed focal length lens is a lens that is on most point and shoot and prosumer cameras. They are normally an average wide angle lens. It’s kind of like a “mid range quality” lens. If you then take a zoom lens and compare the two, a fixed focal lens is smaller and often has a larger max aperture. This is good, because they work pretty well in low light situations. These lenses appear clearer than zoom lenses. The only problem here is that your person or subject can appear smaller than you would like unless you move in closer.

Zoom Lenses

And what of a zoom lens? Without going into overly technical details, zoom lenses often have more practical focal lengths for digital photography. They can give you a good angle perspective for filling the frame for example. These lenses are great if you need to take shots closer when it’s impossible to get closer to something.

Optical zooms lenses are the best. My advice to you would be to forget digital zoom altogether. Digital zoom is not a real zoom, in other words it’s not a true representation of what’s there. You’ll just get more noise on your image which can’t really be edited.

The problem with zooms is that they loose light the closer you get. They have lower apertures and this can be difficult in low light conditions. In some situations it’s possible to use the flash and have adequate lighting, but other times you use the zoom because you are far away from the subject and the flash is only effective a few meters away.

There is no general answer to “What lens should I get?” The answer is it depends on what your camera can do and what you want to do yourself. But the more you understand what lenses do what, the better off you are of making an informed decision and get the right lense for the job.


Best wishes,

Amy Renfrey

www.digitalphotographysuccess.com

This photo is copyrighted to www.amazon.com


EzineArticles.com Platinum Author

Sunday, June 25, 2006

A Secret Way To Improve Your Digital Photography

I want to share something with you about digital photography.


Digital photography is an art form....this you know. But did you know what one of the secrets I use in my photography? And use this if you are stumped for ideas on how to take that all-important photograph.

That is this: Forget about photography altogether. Sometimes this will be the best thing you can do in digital photography is to forget you are taking a photo and just absorb the scene.

Okay I know I am sounding obscure... I'll explain.

Its easy to get caught up with all aspects of digital photography. So caught up in fact that you can forget how the heck to take that picture. You can experience 'brain overload' and not end up getting any good photographs at all. You try too hard.

You know what I did when I first started learning digital photography? Instead of trying to perfect the scene I forgot about it and just sat and looked at it. I let the beauty of the scene inspire me and quite my mind. I stop thinking for a minute and became absorbed in the moment of the scene.

I would just look and look and breathe out saying "oh wow, isn't that beautiful?"

Only then would I take the photo, not before. I would get into that meditative frame of mind and let THAT dictate my digital photographs.

You see my good friend, your ability in digital photography is not only the technical, its about the heart. It’s about letting the heart and mind come together, applying some sound techniques and creating art with that camera of yours.

Artistic first, technical second.

Don't be too caught up in what camera to buy etc. Really all you need is a damn good lens and a camera that will give you as many different exposures as possible. To take good, professional standard digital photos you need the lens first, then the camera controls after. The lens is king.
No good lens, no good photos. Its simple.

Just relax, and look at why you were drawn to the scene or subject in the first place. Then free your mind of what you "should" do, and then take a few shots. See what you come up with.

It will be a better digital photo if you free your mind of clutter and relax and focus on the artistic side first.

Best of luck,

Amy Renfrey

All pictures are copyrighted to Amy Renfrey. If you want to use them commercially, do the right thing and just go to my website and email me.

www.digitalphotographysuccess.com

To learn how to take beautiful digital landscape photos: www.beautifuloutdoorphotography.com



EzineArticles.com Platinum Author

Sunday, June 18, 2006

How To Take Sensational Photos Of Your Pets

How boring and uninteresting would life be without an animal to love? There have been studies done in the US about how having a pet reduces blood pressure, stress levels, increases all the other good hormones in our body. Lets face it, pets rock!

So how on earth do we photograph them? I'm not talking about snapping Fido any old way. I mean a classy digital photo where Fido looks exactly the way YOU see him...cute, loveable and gorgeous. The only way to take really great photos of pets is a few things. And take heed, because these things really work.

1. Take them at their eye level.

The problem I see ALL THE TIME with bad pet photos is that they are taking from your perspective, not at Fidos perspective. You see Fido from a height, and thats okay, but the trouble is that taking a shot with this angle doesn't give him the charm or appeal he really has in real life. If you got down on your hands and knees and took the photo from his angle, rather then yours, you'd seriously add a whole other dimension to the photo. Why? Because you are capturing his personality. And this is so important to do because people can't see his personality any other way in the photo other than getting suberb composition.

2. Turn the light on!

Too many times people ask me what they can do to improve their photo of Fido. I look at the picture and so often the pet snaps are quick ones inside. These are too dark and as a result you loose the beautiful personality Fido has and because of this perpetual "indoor snapping" people suffer from, you loose definition too.

3. Spontenaity is the key

Try to wait and have rock solid patience when you are taking your photograph of Fido. Don't take the photo when he is lying down like he always does. People won't ever get to know him through your photography, like you do. So perhaps you can take him outside, or to the park when there is a good amount of light and throw a ball to him and take a picture of him catching it. Or perhaps when he is running around madly outside, or even if you can, get him in a still moment. Or perhaps, if you wait long enough, he migt just look straight into the lens with those big, beautiful eyes that you love so very much and give you that photo you have always wanted. You know "that" ideal photo I mean. The one where people say "awww, isn't he beautiful." And they will finally see the side of Fido that you see; the beautiful pet that he is.

Now get going! Where was the lead and the ball again....


Best wishes,
Amy Renfrey


P.S This is Paddy, my beautiful cat. He's not actually about to eat anything, or attack anything, this is him yawning. Same cat, two different photos.

This picture is copyrighted to Amy Renfrey.

http://www.digitalphotographysuccess.com/


EzineArticles.com Basic Author